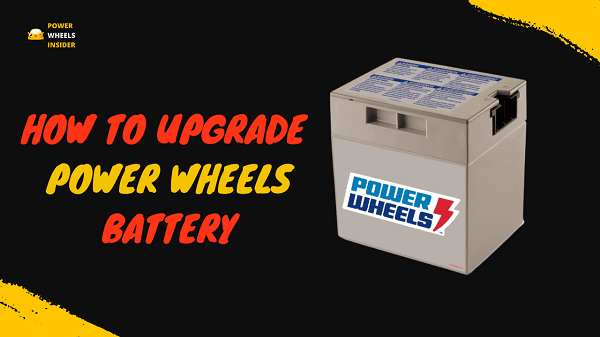
Is your power wheels battery darning quickly? If yes, save yourself from buying the same old battery. Instead of buying the same battery, you can upgrade power wheels battery which will last a longer time and give your kids some extra ride time on their favorite power wheels.
Power wheels battery upgrade is the best way you can improve the ride on time for your kids. You can upgrade the power wheels battery from a 6-volt battery to a 12-volt battery or from a 12-volt battery to an 18-volt battery at home.
By upgrading power wheels battery the performance of the power wheels also gets improved and by this your kid will enjoy extra speed and good music system of power wheels which required high battery usage.
In this article we are going to give a complete guide on Power Wheels Battery Upgrade at home read it out it will certainly going to help you for sure
How to Upgrade Your Power Wheels Battery

Power wheels battery upgrade sounds like a tough job for anyone but it is a very simple process that can be done at home easily.
Before upgrading, you must have some tools that are required to change/ upgrade the power wheels battery. The tools are very easy to find at local hardware stores or you can buy it online from where you are buying power wheels battery.
I am going to list down all the tools that are required for upgrading the power wheels battery.
List of Tools Required
- New Battery of Required Volts Like 12V, 18V, or 24V
- Power Wheels Battery Upgrade Kit [ in this you will get all the tools required]
- Wire strippers
- Electrical tape
- Electrical wire
- USB adapters which are required for specific batteries
- Screws
- Mini pliers
- Mini screwdriver set
- Voltmeter
- Fuses
- Connectors
| Image | Name | Link |
|---|---|---|
 | Power Wheels 6-Volt Rechargeable Battery | Check at Amazon |
 | Power Wheels 12-Volt Rechargeable Battery | Check at Amazon |
 | Power Wheels 24-Volt Rechargeable Battery | Check at Amazon |
 | Power Wheels Battery Upgrade Kit | Check at Amazon |
Steps to Upgrade Power Wheels Battery at Home
Step 1: Setting up Your Power Wheel for Upgrade
First, you need to check the power wheel is turned off before starting anything to avoid getting shocked. Place power wheels in a clean and open place so that you can upgrade the mini car without any disturbance or mixing parts.
Step 2: Removing the Old Battery of the Power Wheels
Carefully Detach the old battery-connected plug from the power wheel plug. Keep the old battery on the ground or at a place where you are comfortable.
Now open the old battery cover to detach the connectors of the battery using a screwdriver.
Clean the battery box [hood] where the new battery will be placed
Step 3: Place and Connect New Battery
Power wheels battery is so easy to replace and connect with the help of color coding of wires. Use the same color wire to connect the battery to the power wheel.
For example, connect red wire with the red terminal or blue wire with the blue terminal. After that cover the exposed part of the wire with insulation tape for extra safety.
Paring 2 Batteries Guide
If you want to pair two batteries one old and new then you have to follow some simple steps to connect two batteries in series or in parallel to flow from both batterers for better performance of the power wheel.
You can choose any flow series or parallel depending on your requirement.
Connect the old battery negative terminal to the new battery positive terminal to generate electric flow between the two batteries. The free terminals of the batteries should be connected to the power wheels system with a fuse.
For Series:
In series flow, the voltage gets combined to generate more power by which power wheels will get faster in speed.
For this connect the negative terminal of the old battery to the positive terminal of the new battery
For Parallel:
In parallel flow, the amp gets combined to increase the run time of the power wheels to run for longer periods of time.
For this connect the negative terminal of the old battery to the negative terminal of a new battery and connect the positive terminal of the old battery to the positive terminal of a new battery.
You can pair two 6V Batteries which will combine to give you 12V power to your power wheels but I will prefer to use one upgraded battery from 6V to 12V for better results.
Step 4: Connect Fuses
You have to connect an inline fuse to the battery so that it will save the battery from overheating or other problems.
If your power wheels are overloaded or over-run the fuse will save the battery and stop the battery from getting affected by this issue.
Just connect the fuse wires one with the battery and another end of the fuse wire with the power wheel system as simple as that.
Step 5: Installing of Motor Speed Controller
Motor Speed Controller helps to control the speed of the power wheels motor for avoiding over-speed as parental control it is not necessary but you can add it as your choice.
It should be placed between the battery and the motor it has a dial by which you can set a limit on the power wheel. The limit can be the voltage limit that can be set for power transmission to the motor.
Step 6: Cover the Hood of the Power wheel
After setting up everything make sure all the things are placed correctly and safely. Check whether there is a long wire in the hood from the battery or any other part if you find a long wire try to zip it as small as possible just to be safe.
After all the checks close the hood tightly to secure all the things under it will not come out that’s it you are all done to test now.
Step 7: Test the Power Wheels
After all the hard work you have done now, it’s time to test the power wheel to make sure it is working properly or not.
Start the power wheel and press the accelerator for a few seconds to check the power is flowing properly from the battery to the motor. When everything looks fine charge the power wheel first.
Then run the power wheels to check the improvement in power, speed, and run time of the power wheel. you can see the power wheels go faster than before.
What is Power Wheels Battery Upgrade Kit?
Power Wheels Battery Upgrade Kit is a group of tools that are required when you are upgrading the power wheels battery. It will save you lots of time to buy tools separately.
All the required tools come with the kit. You can Buy This Power Wheels Battery Upgrade Kit from Amazon easily.
Items that you will get in this kit are:
- Adapter for Dewalt
- Adjustable low DC low-voltage protection
- DC PWM Motor Controller
- 12-Gauge wire
- 30A fuse
- Quick terminal
- U terminal
How much time it will take to upgrade the battery?
Not Much, Power wheels battery upgrade will take around 15 to 20 minutes hardly when you use pair batteries to set connections in series or parallel.
It will take much less time when you upgrade a single battery.
Changes you can see After the Battery Upgrade
You will see lots of changes after you upgrade the battery of the power wheels most of the changes can be seen right after the upgrade and some after days.
Longer Run Time
After you upgrade from 6v to 12v or 12v to 18v you can see this change immediately after the upgrade. This is because of the high-power battery which gives your kid’s mini car a boost in long run.
You can see the run time of your kid’s power wheel almost doubled which will give your kid to have extra ride time on their favorite toy.
Boost in Performance
You can see better performance from the power wheel after the upgrade has been done it will have more power to run on sloppy roads or small ups and downs.
You will find the mini car will not stuck in between or calming the slope which can be found in a 6v battery mini car.
Faster in Speed
When the power wheel gets upgraded you can see the speed of the power wheels will be boosted. You can see up to a 50% boost in the speed of power wheels depending on the mini car.
This is the best way to make your power wheels go faster. You can also read a full article on this.
Longer Charging Time
When the battery is upgraded the amount of time required to charge the power wheels also get increases. This is the only negative side of the upgrade but it can be neglected while seeing the positive side.
You can also change the Power Wheels charger if needed to get faster charging for the new battery which is suitable for the new battery.
